
1.0 PURPOSE:
2.0 SCOPE:
The SOP for operation and cleaning of Friability test apparatus covers the detailed procedures for operation and cleaning of the instrument used in Quality Assurance, Production and Quality control department of (Company name).
3.0 DEFINITIONS:
4.0 RESPONSIBILITY:
4.1 Officer QA, Production and QC to Operate/clean Friability test apparatus as per the SOP.
4.2 Head of the Department (or) His designee is responsible for ensuring compliance to SOP.
5.0 PROCEDURE:
5.1 Ensure that the tester is clean on the outside, if not then clean with a soft cloth.
5.2 Operation:
5.2.1 Place the instrument on a strong-levelled table.
5.2.2 Connect the Printer cable. Keep the printer ready with the paper fed and switch ON the Printer.
5.2.3 Load the drum on the shaft such that the pin on the drum engaged into the hole provided on the Bosch.
5.2.4 Insert the knob on the shaft after the drum is loaded. Rotate the knob until you perceive the audible “Click,” signifying the successful locking of the knob.
5.2.5 To remove the drum, press the button on the knob and pull out the knob.
5.2.6 Insert the tray into the tray holder.
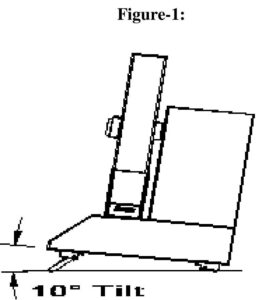
5.2.7 Set the instrument to 10° tilt if desired (Refer Figure-1).
5.3 Instrument Setting & Testing:
5.3.1 After the system set up is over, switch ON the power.
5.3.2 After Power ON, the drum would initialize itself to the loading position.
5.3.3 The system is now ready for the Setting of test parameter & to Run the test.
5.3.4 Press the SET key to set the test parameters.
5.3.5 Select the Time or Count mode using the RUN MODE key on the front panel. The desired value for the selected mode can be set using the UP / DOWN & DIGIT SCROLL keys and Press the ENTER key to go to the next
5.3.6 Set the RPM as mentioned in the individual STP. Utilize the UP/DOWN and DIGIT SCROLL keys to set the desired value within the range of 20 RPM to 50 RPM. Unless otherwise mentioned in the individual test procedure set the RPM 25 for Friability Drum. Press the ENTER key to go to next parameter.
5.3.7 The next parameter is for selecting the Weighing Scale Connection Option. This option can be enabled (Yes) or disabled (No) using the numeric keys 1 or 2. If this option is disabled then the analyst has to enter the weight of the test samples manually. Press the UP/DOWN key to go to the next parameter.
5.3.8 The instrument will display the Clock setting. The default setting for this menu will be the current time. The time can be entered using numeric keys. Press F1 Key to save the updated date and time. Press the Down arrow key to go to the next parameter.
5.3.9 The next menu is for the selection of the option to Print the Last Test result. If this option is set to “YES “, & ENTER key is pressed then the result of the last test is printed before the new test has started.
5.3.10 Pressing the ENTER key, the operator can access the next menu for the Sound option. Using the UP / DOWN key, the operator can enable (Y) or disable (N) this option. Disabling this option will block the Sound for the key press & for the end of test.
5.3.11 Press the SET key to exit from the SET Menu or Press the ENTER key to scroll back to SET Menu.
5.3.12 Press the START key to run the test. Weigh the test samples.
5.3.13 After weighing the test samples, slide them gently into the drum through the side slit and press START key to run the test.
5.3.14 The drum would now start rotating for the programmed Time or Count value.
5.3.15 After the test is over, the drum rotates in the reverse direction, discharging all the test samples into the tray located below the drum.
5.3.16 The drum would now initialize itself to the loading position Gently pull out the tray and eliminate any loose dust from the test samples. i.e. dedust the test samples. After dedusting, place the test samples on the weighing scale pan.
5.3.17 Weigh the test samples and enter the weight using UP / DOWN & DIGIT SCROLL key. Pressing the ENTER key will register the weight in the memory.
5.3.18 If the Weight after the test is more than the Initial weight of the test samples, then the instrument will prompt an error message. The operator can select the option either to Abort the test or to Reweigh the test samples.
5.3.19 If the printer is not connected or not ready, then the Instrument will prompt the message every 5 Sec till the printer is made ready or the print option is disabled (Select to N & ENTER key is pressed).
5.3.20 Pressing the SET key will initialize the instrument for the new test.
5.3.21 Record the instrument usage in instrument usage log book Annexure-I.
5.4 Cleaning procedure:
5.4.1 Press the button on the knob and pull the knob out and remove the two drums.
5.4.2 Remove the trays from the holders
5.4.3 Clean the drums and trays using purified water and dry them with lint free cloth or compressed air.
5.4.4 Load the first drum on the shaft such that the pin on the drum enters into the provided hole.
5.4.5 Place the second drum on the shaft such that the pin on the drum enters into the hole provided on the first drum.
5.4.6 Insert the knob on the shaft.
5.4.7 Press the knob to hear click sound, which indicates locking the knob.
5.5 Precautions:
5.5.1 Do not hold the drums while rotating.
5.5.2 Do not use wet drums.
5.5.3 Make sure the knob is properly fitted to the shaft.
5.5.4 Do not use abrasive, aggressive materials or solvents to clean the drums and trays.
6.0 ABBREVIATIONS:
6.1 SOP – Standard Operating Procedure.
6.2 QA – Quality Assurance
6.3 QC – Quality Control
6.4 PM – Rotation for minute.
8.0 LIST OF ANNEXURS:

2 thoughts on “SOP for operation and cleaning of Friability test apparatus”
Pingback: Procedure for operation and cleaning of portable de-humidifier -
Pingback: SOP for operation and cleaning of tablet hardness tester -